Hello Ladies, We know being a woman is colorful and the journey of our body goes through a biological roller-coaster. Menopause is something that can be seen as ‘transition into a new phase of life’. In this article of Yoga for Menopause we will first discuss about the biological aspects of menopause. Then we will move to understand various stages of menopause. After that we would walk through the exact reasons why doing yoga helps with menopause. And in the last section we will delve deeper into the asana and pranayama that one should practise to get maximum benefits from yoga in menopause.
Biological aspects of Menopause
Basically, a woman is born with eggs stored in her ovaries. The ovary is also responsible for the creation of estrogen and progesterone, the hormones that control the periods, and the release of eggs (ovulation). Now when the ovaries no longer release the eggs every month, menstruation stops and menopause begins. It is considered the inception of Menopause when a woman hasn’t experienced menstruation for a period of one year. It is the phase when a woman can no longer become pregnant naturally, marking the end of fertility.
Stages of Menopause
The entire process of menopause is classified into three stages:
- Peri-menopause
- Menopause
- Post-menopause.
Menopause comes with a lot of pain and uneasiness in a woman’s body. Most women who are about to enter menopause will experience the following symptoms:
- Hot Flashes
- Vaginal Dryness
- Sore Breasts
- Weight gain
- Depression
- Anxiety
- Difficulty in concentrating
- Reduced Libido
- Headaches
- Painful or stiff joints
- Loss of muscle mass
These symptoms may vary in severity and duration as they are generally the results of declining levels of estrogens, progesterone, follicle-stimulating hormone (FSH), luteinizing hormone (LH), and other hormones.
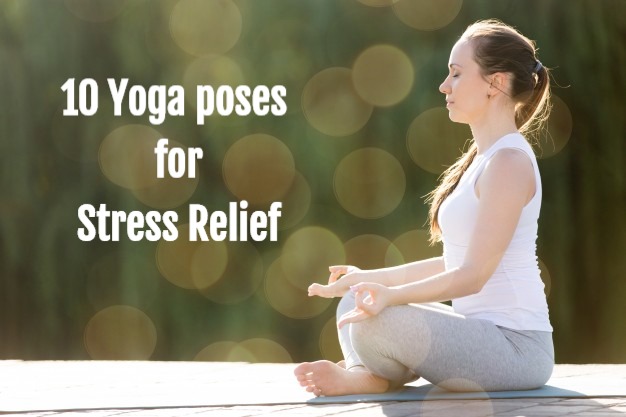
While there is no denying the fact of how unpleasant and painful this phase is, there is a practice regime that alleviates the pain and helps restore the calmness in the body – Yoga. Yes, Yoga. Many women have found that the regular practice of yoga has the capacity to eliminate the undesirable side effects of menopause. Research has also shown that practicing yoga constantly may provide ample amount of relief from several symptoms including hot flashes!
Yoga being a natural-comprehensive remedy will help quiet the mind, body, and soul.
Reasons to practice yoga during Menopause
- It’s a natural remedy
- Yoga helps to relieve stress
- Helps in reducing blood pressure organically
- Yoga improves joint health
- Yoga helps to reduce hot flashes.
- Yoga provides relief from physical as well as mental discomfort.
- Yoga is linked to better weight management.
Further ahead, we will see the best yoga poses suited for Perimenopause, Menopause, and Post-menopause along with some best practices and yoga poses specially designed for several symptoms of menopause like Insomnia, Anxiety, depression, and weight gain.
Yoga poses for Perimenopause.
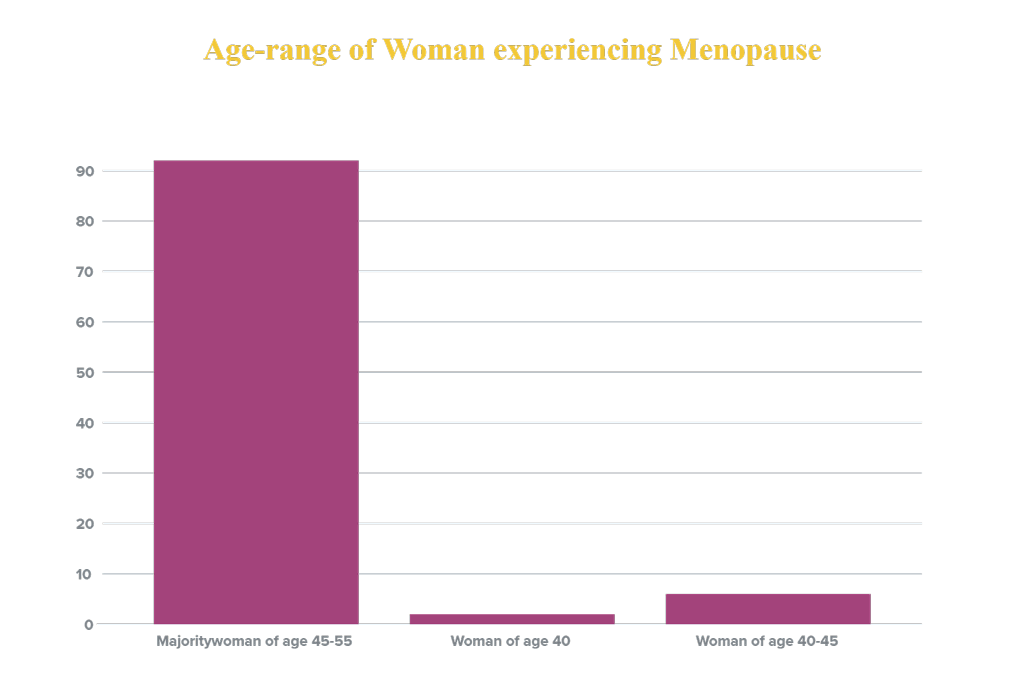
Perimenopause is the official stage that takes place 3-4 years before menopause. This is the phase where ovaries gradually begin to make less estrogen leading to irregular periods. Your menstrual cycle may be late or may completely skip one or more cycles. Menstrual flow may be heavier or lighter. It usually starts in the ’40s, but in some cases, it may also start in a woman’s ’30s.
Regular practice of yoga can prepare you as well as provide you with relief during this particular stage of menopause. Although one must keep in mind that excessive hot yoga during this phase may exacerbate symptoms. Instead, follow a simple yoga routine or restorative yoga practices.
Some of the most common problems faced by women during this phase are:
- Vaginal dryness (which reduces sex drive)
- Hot Flashes
- Breast Tenderness
- Mood swings
- Irregular Periods
We have listed below best-suited yoga poses for Perimenopause with gentle and mindful movements to keep you grounded, connect you to your body, and relax the mind.
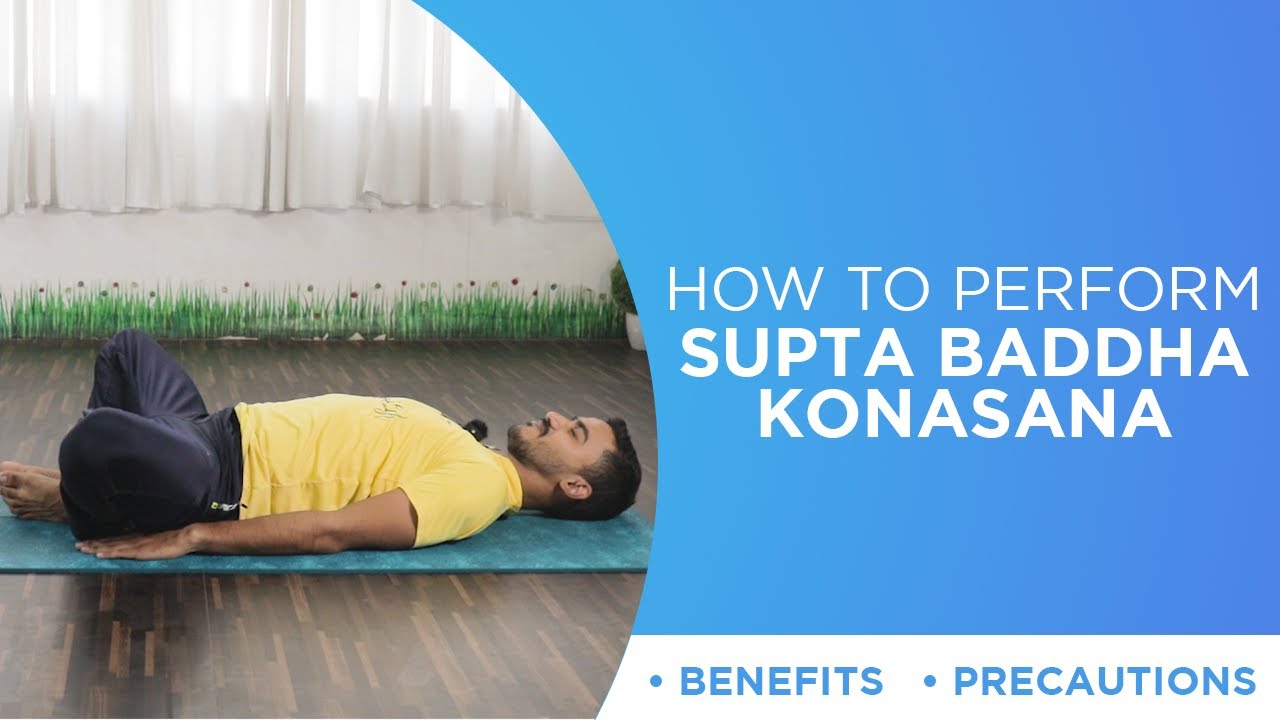
1. Reclining bound angle pose | Supta baddha konasana
Steps:
- To begin with, get into ‘Staff pose | Dandasana’ with your legs stretched in front of you. Use a mat or blanket if possible.
- Bend your knees and bring the heels towards your pelvis. Press the soles of your feet together and allow your knees to drop open on respective sides. This is the Bound Angle pose or Cobbler’s Pose or Baddha Konasana.
- Now gently lean backward and place your elbows on the floor. Then slowly lower your back all the way to the floor.
- Now adjust your position by gently pushing your buttocks from side to side so that your spine lengthens along the floor maintaining the natural curve of the lower back.
- Let your arms relax with palms facing up and draw your shoulder blades gently inwards.
- Lengthen your tailbone towards the heels and relax your buttocks.
- Close your eyes. Take a few deep breaths. Allow your body to feel heavy.
- Stay in this position for one minute and gradually extend your stay anywhere from five to ten minutes at your convenience.
- To come out, draw your knees together, roll to your right side, and use your hands to press yourself up to a comfortable position.
Precautions:
- Avoid this Asana if you have an injury in the knee, hip, groin, lower back, or shoulder.
- Always work with your own range of limits and abilities. Do not push your body.
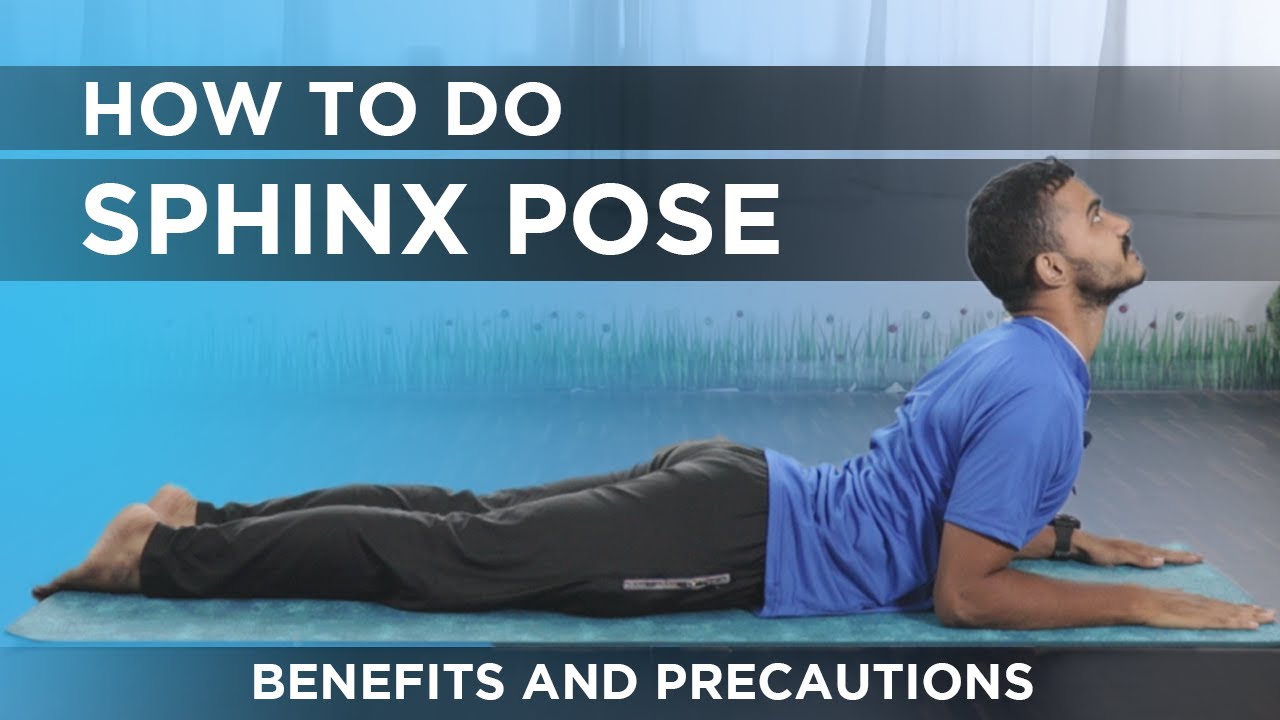
2. Sphinx Pose | SalambaBhujangasana
Steps:
- Lie on your belly, legs side by side.
- Keep your toes stretched and feel at ease.
- Now set your elbows under your shoulders and your forearms on the floor parallel to each other.
- Inhale and lift your upper torso and head away from the floor into a mild backbend.
- This belly lift supports and distributes the curvature of your backbend more evenly along the length of the spine, soothing your lower back and awakening your upper back.
- Stay for five to 10 breaths, then exhale and slowly release your belly and lower your torso and head to the floor.
Precautions:
- Avoid this pose if you have any back injury or headache.
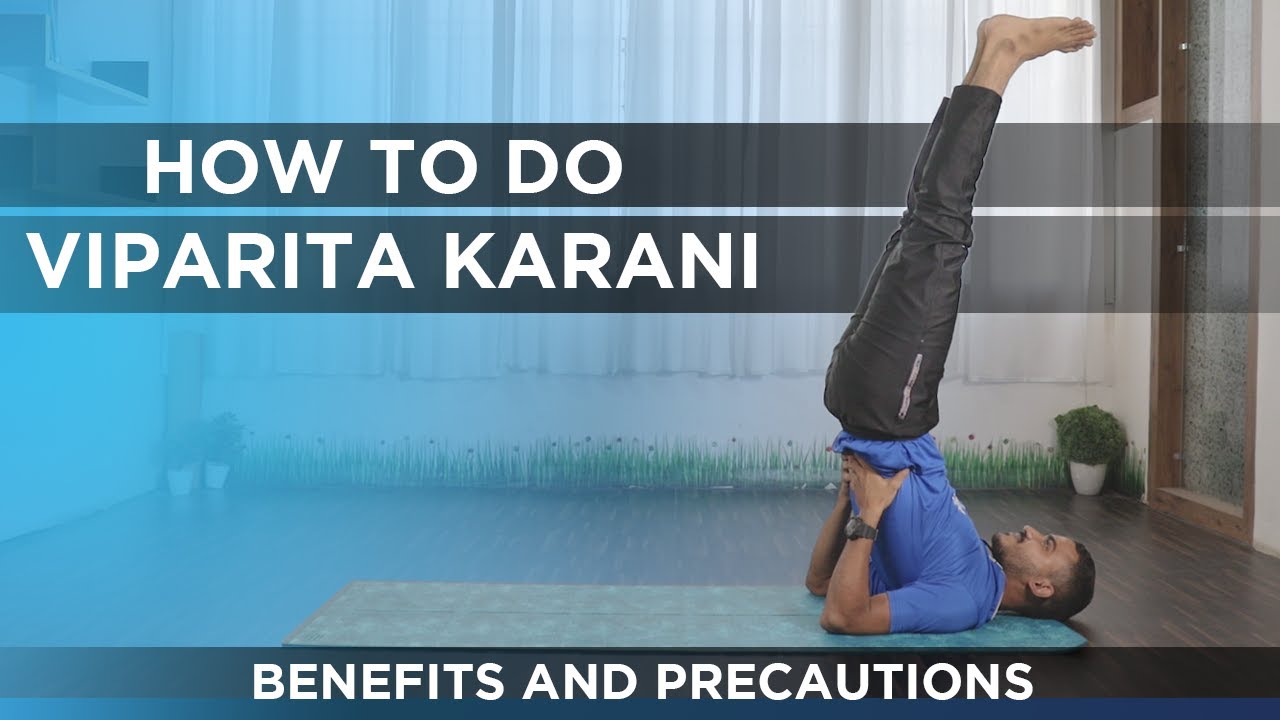
3. Legs Up The Wall Pose | Viparit Asana
Steps:
- To perform this pose, you need to find a space near a wall.
- Sit in front of the wall and lie down and keep your knees bend.
- Keep your hands by your side and raise your legs and let it touch the wall.
- Maintain distance between your buttocks and the wall so that you can push it to stretch more.
- Make sure your back and head are resting on the floor, making a 90-degree angle.
- If needed, use your hands to support your hips and form a curve in your lower body.
- Do not put pressure on your neck.
- Close your eyes and breathe. Hold the position for at least five minutes. Relax and roll yourself on any side.
Precautions:
- To be avoided during menstruation.
- Avoid practicing this pose if you have eye problems like glaucoma.
- If you notice a tingling in your feet when you practice this pose, bend your knees and touch the soles, bringing your heels close to the pelvis.
4. Downward Facing Dog Pose | Adho Mukha Svanasana

Steps:
- Stand straight on your legs then bend forward.
- Place your palms on the floor, note that your fingers are widely spread and balanced.
- There should be enough space between your knees and palm.
- Now, take note that your wrists are exactly aligned with your shoulder, and knees aligned with hips.
- Stretch your elbows and let your upper back relax.
- Lift both your knees from the floor and raise your pelvis too.
- Straighten your legs gradually, as straight as possible.
- Bring your body into the shape of the alphabet ‘A’.
- Stay stable and do not change the distance between your palms and feet.
- Draw your shoulder blades into your upper back ribs and toward your tailbone.
- Hold this position for 30 seconds and later you can increase your time limit.
- To relax from that position, relax your knees, and bend down.
Precautions:
- If the person practicing this pose has stiff or weak back muscles, tight hamstrings, sciatica, or knee problems should practice this pose gently and gradually easing in and out of the pose while keeping the knees bent and back straight.
- Those with Carpal Tunnel Syndrome should press down into the base of their fingers.
5. Wide-angle seated forward bend | Upavistha Konasana

Steps:
- Sit on the floor with your legs stretched wide apart until you can feel a good stretch. See that your knees and toes are pointing towards the ceiling.
- Keeping the spine straight, bend from the hips. Place your hands on the floor between your legs, and slowly exhale as your start walk your hands forwards.
- Maintain length along the front of your body as you come further into the forward bend. Do not lower any further if your backaches.
- Walk your hands forward as far as you can, and hold for 5-10 deep breaths, keeping your quad muscles engaged.
- Now slowly return back to the upright position, using your hands under the back of your knees to bring your legs together.
Precautions:
- Avoid if you have any lower back injuries.
- You can sit on a folded blanket to keep your torso relatively upright.
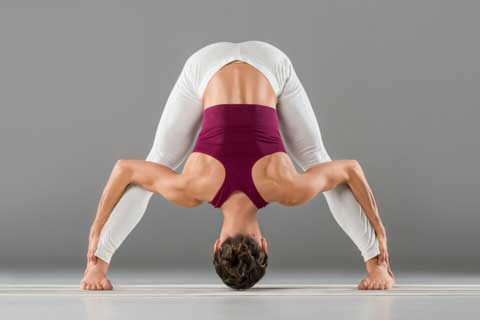
6. Wide Legged Standing Forward Bend | Prasarita Padottanasana
Steps:
- To begin with, stand in Tadasana with feet wide apart. You are aiming for stability and grounding.
- Exhale and lean forward your torso from the hip joint keeping the torso straight. Extend your elbows; your legs and arms should be perpendicular to the floor and parallel to each other.
- Try to push your thighs straight back up to lengthen your front torso and draw your inner groins away from each other to widen the base of the pelvis.
- Press your palms firmly to the floor. Make sure to keep your arms parallel to each other and widen the shoulder blades across the back.
- Stay in this pose for 30 seconds to one minute at your convenience.
- To come out, bring lift your torso slowly and walk your hands forward to place them below your shoulders. Then with an inhalation, rest your hands on the hips, pull your tailbone downward and swing the torso up. And finally, walk your feet back to Tadasana.
Precautions:
- Avoid in case of lower back problems.
- Be cautious not to overstretch your hamstrings.
- Distribute your weight evenly.
7. Shoulder Stand Pose | Sarvangasana
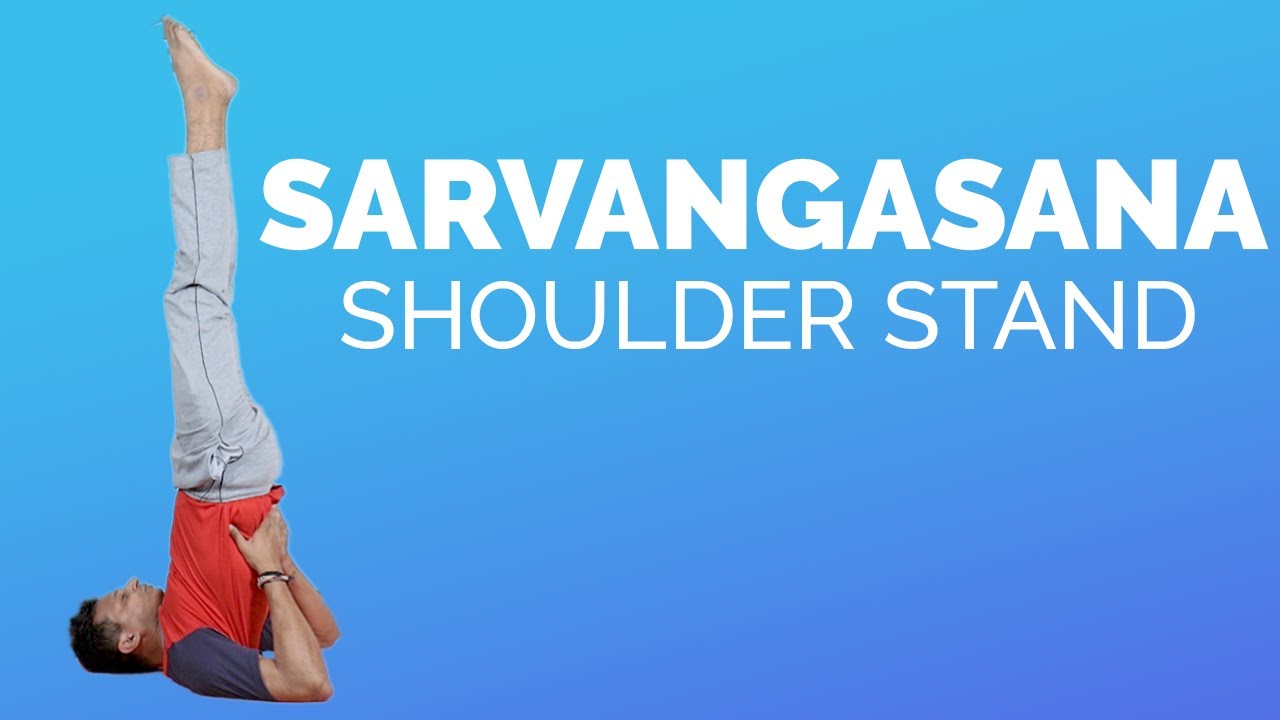
Steps:
- To begin with, lie down on your back with hands on the side.
- Gently lift your legs, buttocks, and back such that you come up high on your shoulders. You can use your hands to support your back.
- Inhale and raise the back and legs up into a vertical position. Your chin should rest against the chest, creating a chin lock.
- Keep your legs firm and fix your eyesight on the toes as you maintain balance.
- Continue normal breathing and remain in this position for about 30-60 seconds.
- To come out, inhale and while exhaling, bend the waist and lower the legs over the head. Bring your hands to the floor.
- Inhale and lower your back on the floor keeping your legs at 90 degrees. Be very gentle while your lower your back. Then slowly lower your legs back to the starting position.
Precautions:
- You will have to be extra careful while performing this asana. Perform each pose very slowly and gently to avoid any mishaps.
- People suffering from high blood pressure, heart diseases, and brain conditions should avoid this asana.
- Avoid if you are suffering from slip disc, enlarged thyroid, headache, or cervical spondylitis.
8. Corpse pose | Shavasana
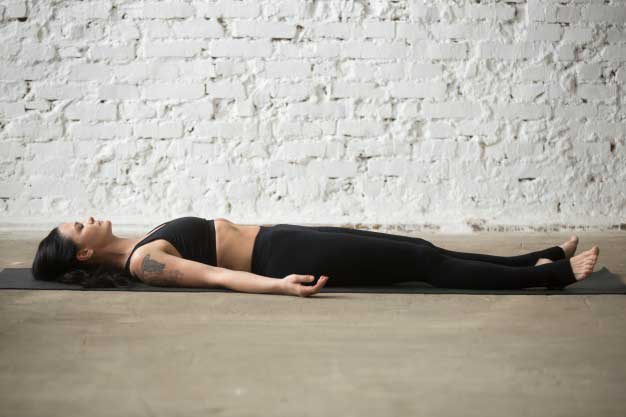
Steps:
- Lie flat on the floor keeping your back straight.
- Your palms, facing upwards, must be placed slightly apart from your body.
- Close your eyes and place your legs comfortably apart from each other. Make sure your toes are facing sidewards.
- Keeping your head and spine in a straight line lay peacefully.
- Take a deep breath, draw attention to every part of your body.
- Breathe slowly, setting your body in a state of deep relaxation. Let it soothe your body, mind, and soul.
- Forget everything and try to focus on your body while breathing. Feel each and every breath going in and out.
- Remain in this position for a few minutes (make sure you don’t fall asleep) and slowly come back to your normal position.
Precautions:
- Avoid doing this Asana in a noisy/disturbing environment.
- Make sure not to move your body while performing this asana. You need to remain completely still as even the slightest movement may disturb your practice.
9. Bridge Pose |SetubandhAsana
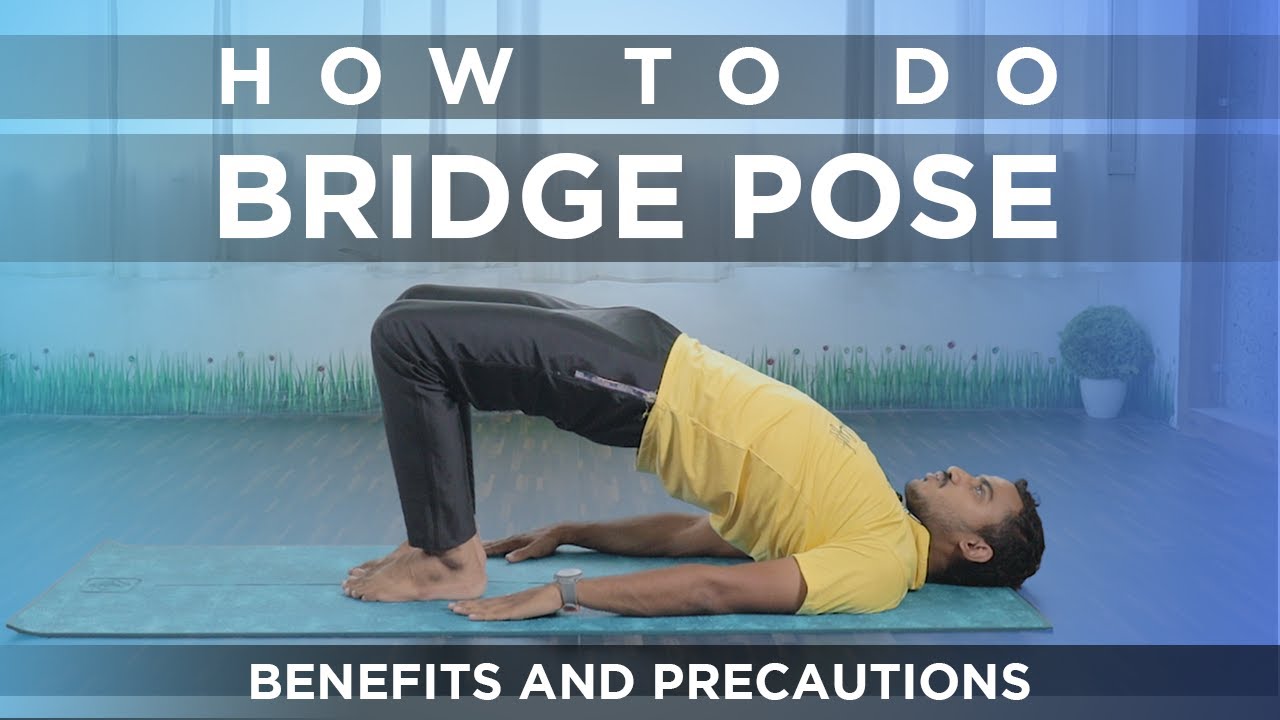
Steps:
- Lying on your back, bend both knees and place the feet flat on the floor hip-width apart.
- Place your arms alongside the body with the palms facing down.
- The fingertips should touch the heels.
- Inhale and lift the hips up, by giving a little pressure on the feet towards the floor.
- Lift your chest up with the support of your arms and shoulders.
- Please note that your shoulders and arms should be resting on the floor.
- Breathe and hold for 4-8 breaths.
- To release: exhale and gently place your spine back to the floor.
Precautions:
- Avoid practicing this pose if you are suffering from neck or back pain.
- Avoid the yoga pose if one is having any knee pain.
- Avoid it during a shoulder injury.
- Avoid moving your head left or right.
10. Mill Churning Pose | Chakki Chalanasana
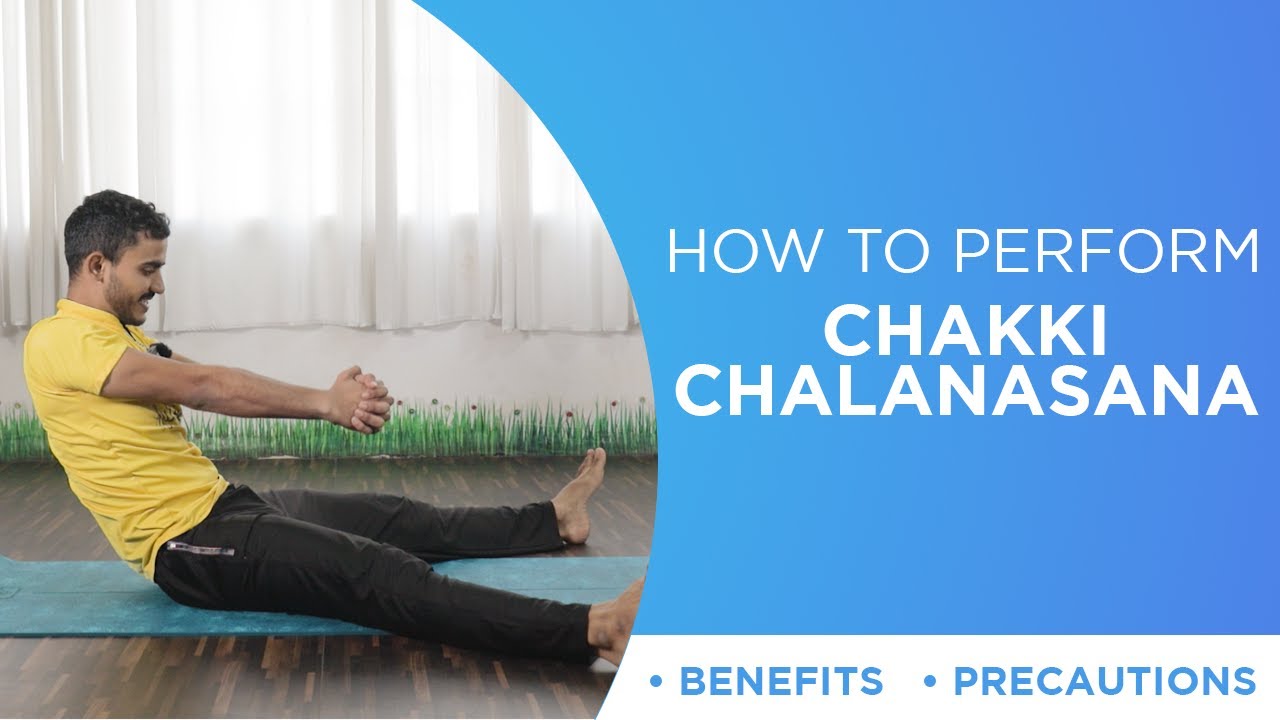
Steps:
- Sit down comfortably with your legs splayed apart.
- Outstretch your arms & clasp your hands at shoulder height in front of you.
- Take a deep breath and start moving the upper part of your body by leaning it to front and right making an imaginary circle.
- Inhale while you lean forward to the right and exhale while you move back to your left.
- Make sure to outstretch your arms while performing this asana.
- Take deep breaths while you perform this Mill Churning pose several times as per your convenience.
Precautions:
- Pregnant women having low blood pressure should not perform this asana. Also, people suffering from Migraine or headache, lower back pain due to slip disk, or had recent abdominal surgery should avoid this asana.
Yoga poses for Menopause
Menopause is the phase when ovaries stop making estrogens completely leading to not releasing eggs; hence this is marked as the end of a woman’s fertility. Usually, menopause is signaled by 12 months since the last menstruation. Research has shown practicing yoga constantly may provide ample relief and alleviate symptoms.
Some of the most common problems faced by women during menopause include:
- Night sweats
- Hot Flashes
- Depression
- Anxiety or Irritability
- Frequent Urination
- Vaginal Dryness
We have listed below some of the best yoga poses that will help reduce the discomforts commonly associated with menopause.
1. Low Lunge Pose | Anjaneyasana | Yoga poses for Menopause

Steps:
- Start this asana by Downward-facing dog pose (Adho Mukha Svanasana).
- Breathe out and bring your right foot forward beside your right hand.
- Make sure your right knee and ankle are parallel to each other.
- Gently lower down your left knee and place it on the floor right behind the hips. Your left foot should be resting on the floor completely.
- Breathe in and lift your torso up. Simultaneously raise your arms above your head in a way that your shoulders are touching your ears.
- Make a ‘Namaskar’ gesture by combining your arms.
- Look up and bend your head slightly backward.
- Exhale, relax your hips, and hold on to this pose for 15-20 seconds depending the feeling of stretch within the frontal region of your legs.
- To release this pose, place your hands back to the floor and get back into the Downward-facing dog pose.
- Repeat this with your left foot.
Precautions:
- Do not perform this asana if you have high blood pressure.
- If you have shoulder problems, practice it by keeping hands on your thighs.
- Avoid this asana in case of any knee or hip injury.
2. Forward Bend | Uttanasana | Yoga poses for Menopause
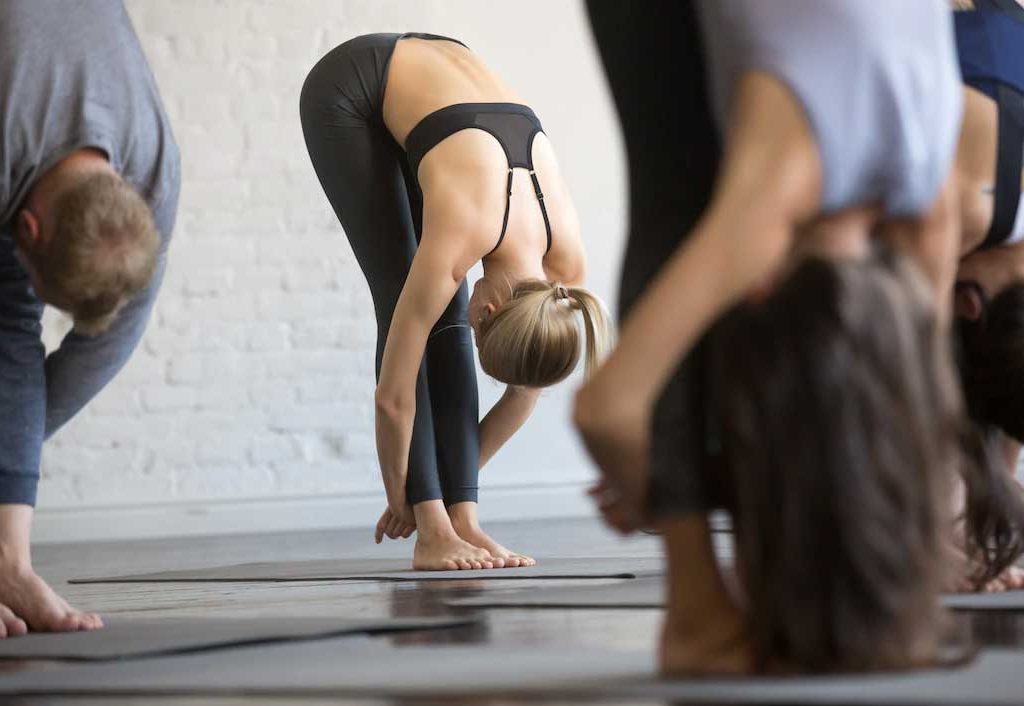
Steps:
- Stand straight on the ground and maintain distance between your feet.
- Raise both your arms together towards the sky with a deeply focused inhalation.
- Exhale and bend forward, letting your palm touch the floor.
- Your hips would act as a common point between the upper body and lower body, maintain balance.
- Feel your back stretching in opposite directions as you pull the head down and in and press the hips up.
- Breathe and hold for 4-8 breaths, pressing the belly into the thighs on the inhalation.
Precautions:
- You need to refrain from practicing this pose if you face chronic problems or have a history of any injury in your knee joints, ankle joints, or back.
3. Cat-Cow pose | Yoga poses for Menopause
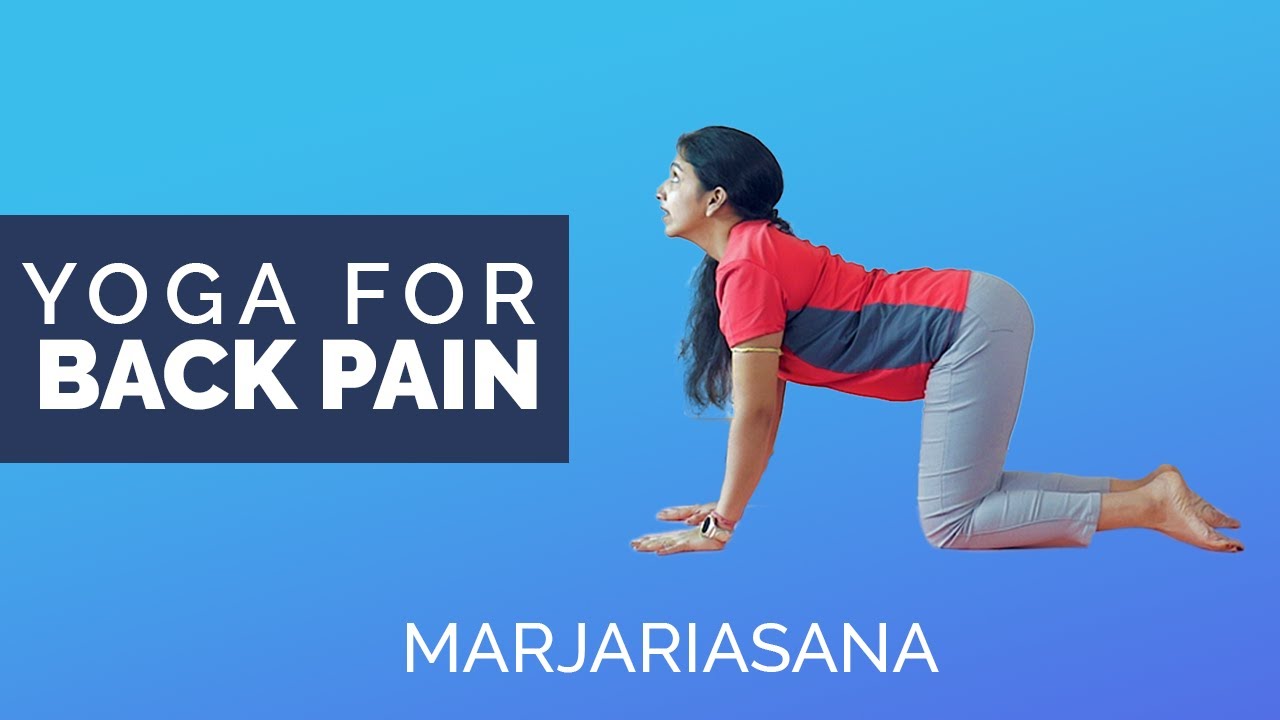
Steps:
- First, come to a position same as a baby crawling that would be palms on the floor and knees on the floor.
- Be in a neutral position with your head and neck and spine aligned.
- Then we will begin with Cow Pose, so inhale when you drop your belly towards the mat. Lift your chin and chest, and gaze up toward the ceiling.
- Then, we will move to Cat Pose, you exhale and push your belly to your spine and round your back toward the ceiling. The pose should look like a cat stretching its back.
- Inhale, coming back into Cow Pose, and then exhale as you return to Cat Pose.
- Repeat 5-20 times and rest.
Precautions:
- Avoid this pose if you have any knee injury.
- A pregnant woman should also avoid this pose and it might stress the belly or practice it when supervised.
4. Chair pose | Utkatasana | Yoga poses for Menopause
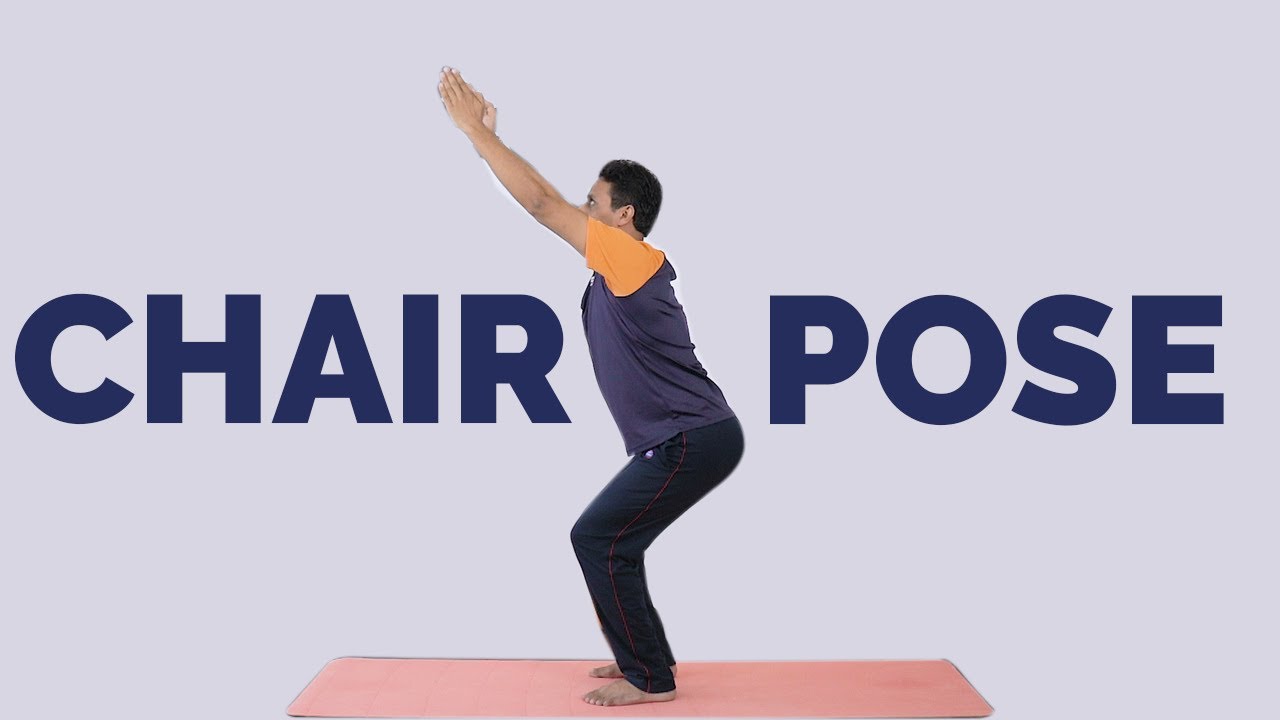
Steps:
- Stand straight with the spine erect and arms at your side.
- Maintain one hand distance between the feet.
- Stretch your hands forward keeping them parallel to the floor. See that your hands are straight and palm faced downwards.
- Now gently bend your knees and bring your pelvis down as if sitting on a chair. Try to bring your thighs parallel to the ground.
- Hold onto this position for a few breaths.
- Release this position to come back to the starting position.
- Repeat this pose 3-5 times.
Precautions:
- Avoid this pose if you have knee problems or Arthritis.
- Also avoid in case of low blood pressure, insomnia, or headache.
5. Sphinx Pose | SalambaBhujangasana | Yoga poses for Menopause
Steps:
- First, lie down on your belly and keep your legs side by side.
- Keep your toes stretched and feel at ease.
- Set your elbows under your shoulders without hunching and your forearms on the floor parallel to each other.
- Inhale and lift your upper torso and head away from the floor into a mild backbend.
- This belly lift supports and distributes the curvature of your backbend more evenly along the length of the spine, soothing your lower back and awakening your upper back.
- A little stretch would be felt on your abdomen.
- Stay for five to 10 breaths, then exhale and slowly release your belly and lower your torso and head to the floor.
- Repeat the process for 4-5 times and take rest.
Precautions:
- Avoid this pose if you have any back injury or headache.
6. Legs Up The Wall Pose | Viparit Asana | Yoga poses for Menopause
Steps:
- To perform this pose, you need to find a space near a wall.
- Sit in front of the wall and lie down and keep your knees bend.
- Keep your hands by your side and raise your legs and let it touch the wall.
- Maintain distance between your buttocks and the wall so that you can push it to stretch more.
- Make sure your back and head are resting on the floor, making a 90-degree angle.
- If needed, use your hands to support your hips and form a curve in your lower body.
- Do not put pressure on your neck.
- Close your eyes and breathe. Hold the position for at least five minutes. Relax and roll yourself on any side.
Precautions:
- To be avoided during menstruation.
- Avoid practicing this pose if you have eye problems like glaucoma.
- If you notice a tingling in your feet when you practice this pose, bend your knees and touch the soles, bringing your heels close to the pelvis.
7. Seated Forward Bend | Paschimottasana | Yoga poses for Menopause
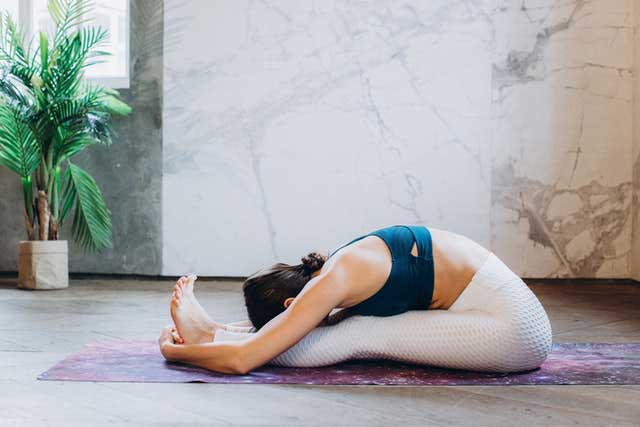
Steps:
- Sit straight on the ground, stretching your legs out front.
- Make sure your toes are together pointing forwards.
- Now, breathe in, raise your arms above, and stretch up.
- Breathe out, bend forward from hip joints. Make sure your spine is erect and move forwards towards the toes, not downwards towards your knees.
- Try grabbing your toes with your fingers and if you’re unable to do that, place your hands on legs as far as you can. The nose should touch the knees.
- Inhale and slightly lift your head and lengthen your spine.
- Move the navel towards the knees while breathing out.
- Breathing in, stretch your arms out in front of you and slowly come back to normal position.
- Breathe out and lower the arms.
Precautions:
- Avoid this asana if you have lower back pain, diarrhea, Asthma, or slip disk. Do not bend beyond your comfort level.
8. Hero Pose | Virasana | Yoga poses for Menopause
Steps:
- At first, sit on the floor or the Yoga mat in kneeling position (Refer Vajrasana).
- Maintain some distance between your feet. It should be slightly more than the width of your hips.
- Keep both your knees under your buttocks.
- Place your hands on your thighs.
- Take a deep breath and lower your buttock to sit on the floor between your feet. You might have to roll your calf muscles to make this happen.
- Make sure your toes are not tucked under your hips. You should be seated right between your feet.
- See that your toes are pointed backward.
- Remain in this posture for 30 seconds to one minute.
- To release, press your palms into the floor and lift your buttocks slowly. Cross your ankles beneath your body and extend your legs forward.
Precautions:
- Stop continuing this asana if you find sharp, twitching sensations or pull in your calves or knees.
- If you have knee pain, you can sit on a block and not on the floor directly.
- Do not push your body. Only practice this asana if completely comfortable.
9. Downward Facing Dog Pose | Adho Mukha Svanasana | Yoga poses for Menopause
Steps:
- Stand straight on your legs then bend forward.
- Place your palms on the floor, note that your fingers are widely spread and balanced.
- There should be enough space between your knees and palm.
- Now, take note that your wrists are exactly aligned with your shoulder, and knees aligned with hips.
- Stretch your elbows and let your upper back relax.
- Lift both your knees from the floor and raise your pelvis too.
- Straighten your legs gradually, as straight as possible.
- Bring your body into the shape of the alphabet ‘A’.
- Stay stable and do not change the distance between your palms and feet.
- Draw your shoulder blades into your upper back ribs and toward your tailbone.
- Hold this position for 30 seconds and later you can increase your time limit.
- To relax from that position, relax your knees and bend down.
Precautions:
- If the person practicing this pose has stiff or weak back muscles, tight hamstrings, sciatica, or knee problems should practice this pose gently and gradually easing in and out of the pose while keeping the knees bent and back straight.
- Those with Carpal Tunnel Syndrome should press down into the base of their fingers.
10. Extended triangle pose | Trikonasana | Yoga poses for Menopause

Steps:
- Stand on your mat with your feet apart. (4-5 feet)
- Keep your heels are aligned with each other.
- Turn your right foot out 90 degrees.
- Raise your arms to the side of your shoulder, and parallel to the ground with your palm facing down.
- Exhale and position your right hand in the same direction as your right foot. Shift your left hip back so your tailbone and pelvis tilt toward the wall or space behind your left foot.
- Turn your left palm forward, with your fingertips towards the sky.
- Rest your right hand near your ankle. Align your shoulders so your left shoulder is directly above your right shoulder.
- Hold this position for 1 minute, take rest and so the same with your left leg turning to 90 degrees this time and repeat the above-mentioned steps with your left hand.
Precautions:
- Avoid practicing this pose if you are suffering from high blood pressure or headache.
Yoga poses for Post-Menopause
Post-menopause is a milestone that has its own merits and demerits. Merits being you no longer have to deal with menstruation, mood swings, or cramps; while the demerits include a bunch of health problems such as muscle & joint weakening and other age-related issues. Menopausal symptoms such as hot flashes gradually ease and fade out. However, the lack of estrogens creates health risks as you get older.
Some of the most common issues faced by women during Post-menopause are:
- Increase in heart-related problems
- Osteoporosis (bone weakening)
- Urinary Tract Infections (UTI)
- Bladder Leakage (incontinence)
- Lower Metabolism rate
The good news is you can enjoy your years post-menopause by caring for yourself and continuing a steady yoga practice during this phase of menopause.
We have listed below best-suited yoga poses for menopause that will keep your bones strong and improve joint function. Regular practice of these poses will keep you flexible and help you maintain your range of motion.
1. Tree pose | Vriksasana
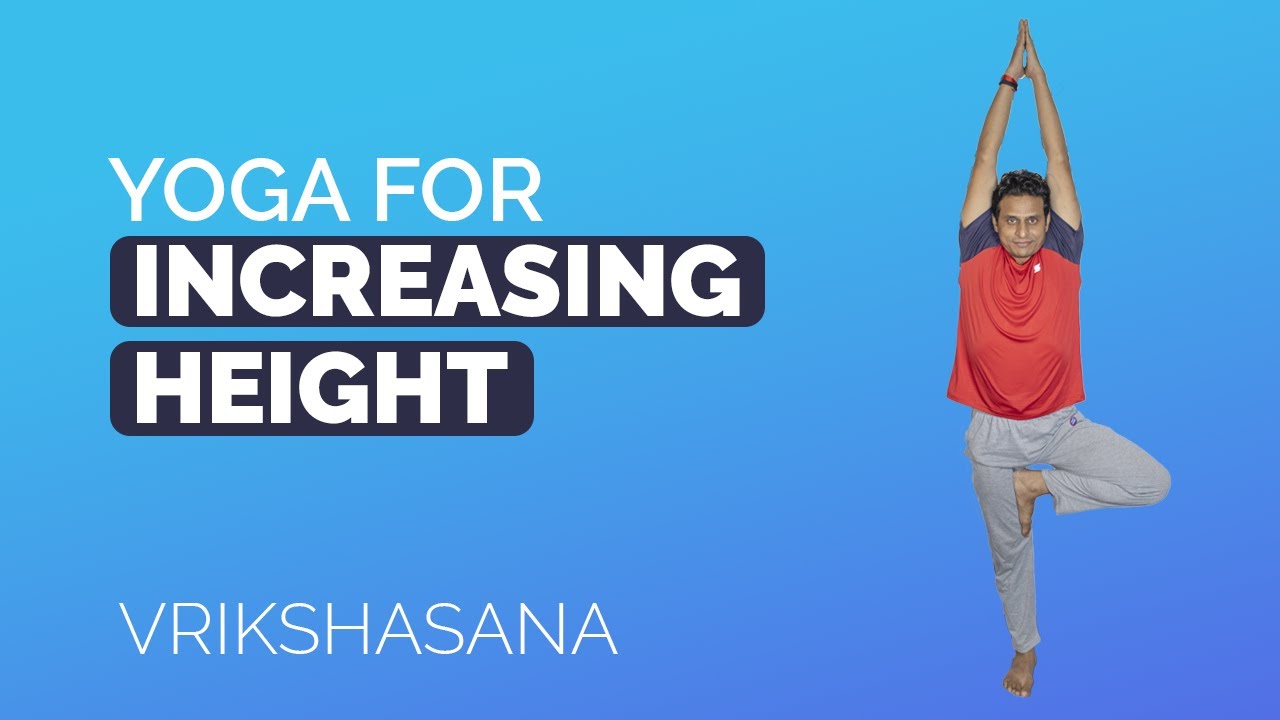
Steps:
- Stand straight with both your legs well balanced.
- Raise your feet and place it on your inner thigh of another leg, above knees.
- Your whole sole area of the raised leg should be touching the inner thigh
- Maintain a balance on one leg might be difficult, try putting a right and balanced amount of weight on the body parts.
- Raise your hands above your head and let your palm face each other, and then brought close to each other, joining.
- Maintain the balance and hold the pose as long as possible, practice it every day, and try keeping a goal of maintaining the pose for 1minute.
Precautions:
- Never place your feet exactly on the side of the knees, as the pressure would damage your knee, thus it should be always placed above the knees in the inner thigh area.
- If you are suffering from high blood pressure, do not keep your hand above your head, place them near your chest.
- Avoid this pose if you are suffering from insomnia or migraine.
2. Reclining bound angle pose | Supta baddha konasana
Steps:
- To begin with, get into ‘Staff pose | Dandasana’ with your legs stretched in front of you. Use a mat or blanket if possible.
- Bend your knees and bring the heels towards your pelvis. Press the soles of your feet together and allow your knees to drop open on respective sides. This is the Bound Angle pose or Cobbler’s Pose or Baddha Konasana.
- Now gently lean backward and place your elbows on the floor. Then slowly lower your back all the way to the floor.
- Now adjust your position by gently pushing your buttocks from side to side so that your spine lengthens along the floor maintaining the natural curve of the lower back.
- Let your arms relax with palms facing up and draw your shoulder blades gently inwards.
- Lengthen your tailbone towards the heels and relax your buttocks.
- Close your eyes. Take a few deep breaths. Allow your body to feel heavy.
- Stay in this position for one minute and gradually extend your stay anywhere from five to ten minutes at your convenience.
- To come out, draw your knees together, roll to your right side, and use your hands to press yourself up to a comfortable position.
Precautions:
- Avoid this Asana if you have an injury in the knee, hip, groin, lower back, or shoulder.
- Always work with your own range of limits and abilities. Do not push your body.
3. Bridge Pose | SetubandhAsana
Steps:
- First, lie on your back, bend both knees and place the feet flat on the floor hip-width apart.
- Place your arms alongside the body with the palms facing down.
- The fingertips should touch the heels.
- Inhale and lift the hips up, by giving a little pressure on the feet towards the floor.
- Lift your chest up with the support of your arms and shoulders.
- Please note that your shoulders and arms should be resting on the floor.
- Breathe and hold for 4-8 breaths.
- To release: exhale and gently place your spine back to the floor.
Precautions:
- Avoid practicing this pose if you are suffering from neck or back pain.
- Avoid the yoga pose if one is having any knee pain.
- Avoid it during a shoulder injury.
- Avoid moving your head left or right.
4. Full butterfly Asana | Poorna Titli Asana

Steps:
- Sit down with your spine erect and legs pulled out straight
- Bring both feet towards your pelvis while both your soles of feet face each other.
- Firmly, hold your feet with your hands. If needed, you may place your hands underneath feet for support.
- Make sure your feet are close to your genitals as possible.
- Start deep breathing and gently press knees and thighs towards the floor.
- Slowly start swinging your knees and thighs up and down and increase the speed at your convenience.
- Take in a deep breath and while you exhale, slowly lean forward. Try keeping your chin up and spine straight.
- Enjoy this posture, take deep breaths & make sure your knees & thighs are closer to the floor.
- Gently try to go back to normal position with legs straight and relax.
Precautions:
- People suffering from Sciatica should use a pillow to raise the hips or completely avoid this asana if too painful.
- Those suffering from groin or knee injury, make sure to out a cushion/blanket on outer thighs. Also if you have lower back disorders, avoid rounding up the spine by leaning forwards.
5. Fish Pose | Matsyasana
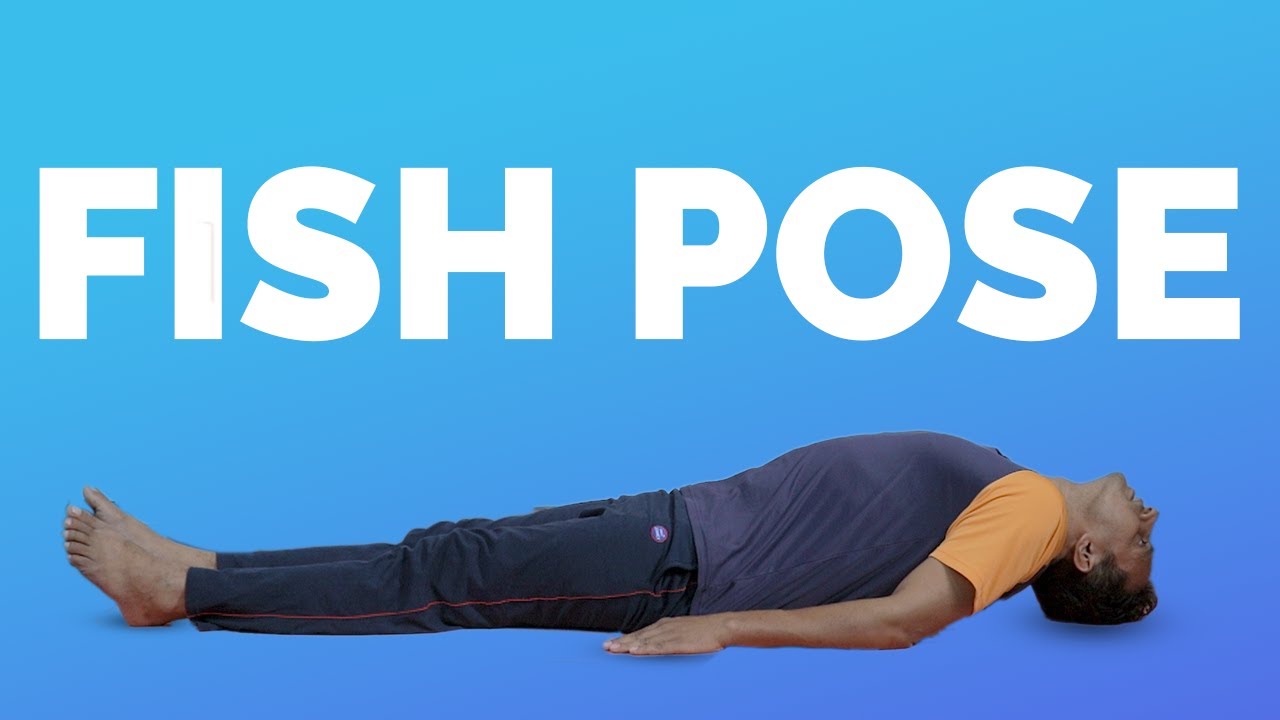
Steps:
- Roll up a blanket and then
- Lie down flat on the floor keeping the rolled blanket
- between your shoulders and hips
- Your head should be thrown back and it should touch the
- floor, hands by your side, palms up, legs straight.
- Breathe in and out gently. If you take 2 seconds to
- breathe in, take 4 seconds to exhale.
- Practice for 2 minutes to start with. Extend time as you go along.
Precautions:
- Avoid this asana if you are suffering from high blood pressure or low blood pressure.
- Avoid practicing this pose if you have any back or neck injury or hernia.
6. Half lord of fish pose | ArdhaMatyasendra
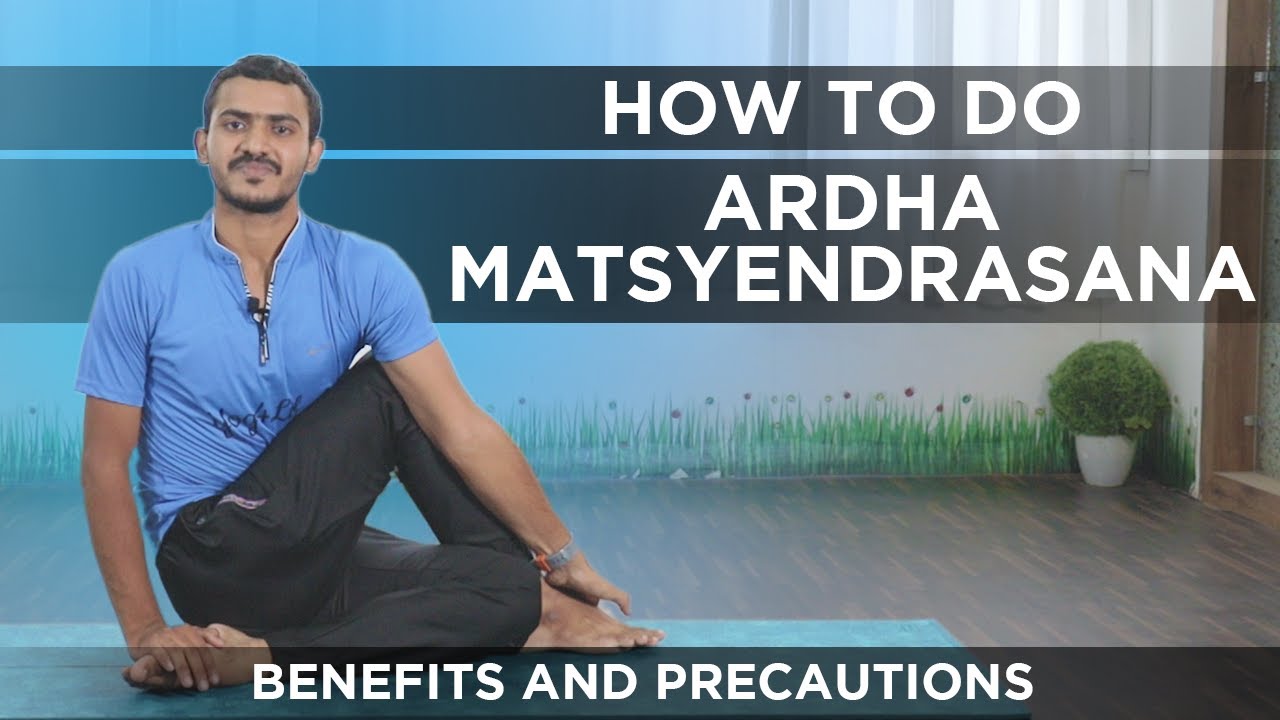
Steps:
- Sit comfortably on your mat and sit straight so that your back, neck, and head are aligned.
- Take the support of your hands, and bend your right knee and place it on the left side of your left hip.
- Now twist your hips and shoulders to your right.
- Place your left elbow near your right knee while the right hand is supporting your back to be straight and balancing the pose.
- Hold it for 5-6 breaths and relax
- Repeat the same with the other leg.
Precautions
- Avoid this pose if you are pregnant or going through menstrual cramps.
- Avoid it if you have gone through recent brain, abdominal or heart surgery.
- If you had a spinal disc slip, then practice it under supervision.
7. Knee to chest stretch | Apanasana

Steps:
- Lie down on your back and bend your knees.
- Gradually inhale and lift your knees towards your chest, support your knees with your arms.
- Lift your neck and try to touch your knees with your nose.
- Hold for 3-4 breaths and relax.
- Continue the process for 5-10 times to throw out all the toxins in your body.
Precautions:
- Avoid this pose if you have a spinal, knee, neck injury, or hip injury.
- Women who are pregnant should not practice this pose after the first trimester.
8. Sleeping Abdominal Stretch Pose | Supta Udarakarshanasana
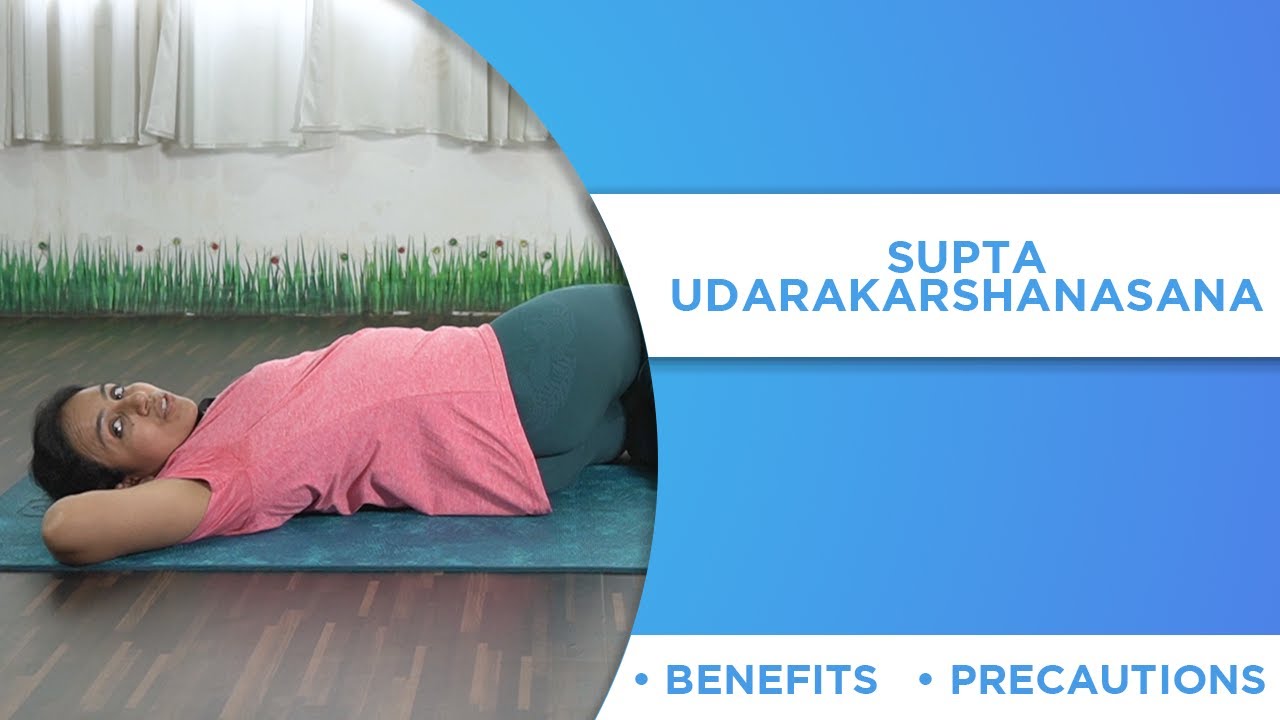
Steps:
- Lie down gently on your back.
- Bend your knees and bring your feet towards your hip. Make sure the sole of your feet is resting flat on the floor.
- Interlock your fingers and place your palm under the back of your head. Push your elbows towards the floor as much as you can.
- Take a deep breath and turn both your legs on the right side. Try to touch your right thigh to the floor.
- Hold your breath for 3-5 seconds and inhale while you bring your knees right back to the center.
- Lower your knees & gently bring back your hands to the side of your body to release this position.
Precautions:
- Those having any kind of hip, knee, or spine injury should avoid this asana.
9. Abdominal breathing | Vashisht pranayama
Steps:
- Relax and lie down on your back.
- Bend your knees and your feet touching the floor.
- Stretch your arms in a way that it has a one-inch distance between your hips and your arms.
- Let your palm face the sky.
- Now you must inhale and exhale and keep focusing on your breath.
- When you inhale air, your stomach stretches and expands while when you exhale, your stomach contracts.
- Breathe slowly and hold your breath between inhaling and exhaling every time.
- Repeat this for 15-20 times.
Precautions:
- Vashisht pranayama can be done by anyone, there is no particular precaution to be taken care of. And it is extremely relaxing and hence always recommended to people following yoga in menopause.
10. Transcendental Meditation
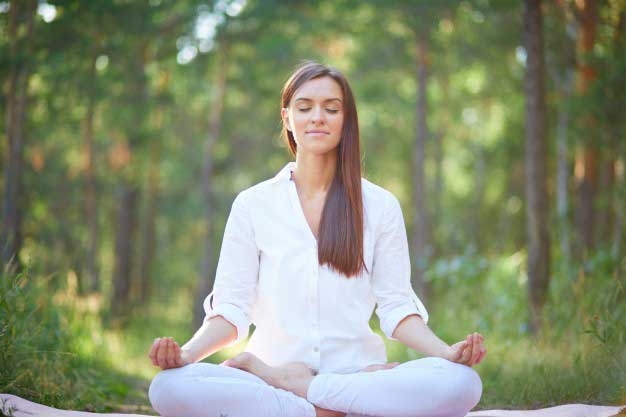
Steps:
- It is similar to mantra meditation, but more customizable.
- Sit comfortably and think of a series of words that make you feel better.
- Close your eyes and breathe, start repeating those series of words.
- Keep focusing on the words and try repeating those words in the right order.
- At first, it might be difficult, but once you zone in, you will automatically notice that without any efforts you are able to repeat those series of words correctly without any effort and you will start enjoying that phase.
- When you feel better, open your eyes softly.
Yogic lifestyle is a way of living that aims to improve the body, mind, and day to day life of individuals. Those who practice yoga regularly have shown to develop an increased tolerance of pain over time. While menopause is an unavoidable phase of life, regular practice of yoga can surely help you combat the symptoms faced during this phase and help you lead a peaceful life ahead.
Next up: If you or your loved ones are suffering from problems related to old age, you might be interested in ‘Slow and Gentle Yoga for Elderly’.
Head on to the link given below to read about how yoga can lift you up from all the age-related problems.